Photography Guide to the Salkantay Trek
Best Viewpoints, Light Conditions & Smart Gear Choices
The Salkantay Trek is one of the most photogenic routes in Peru. In just a few days, you move from glacial high-altitude landscapes to lush cloud forest and finally to unique viewpoints overlooking Machu Picchu.
The dramatic shifts in altitude, climate, and ecosystem make this trek a natural photography playground — whether you’re shooting with a phone or a professional camera.
Here’s a practical, in-depth guide to capturing unforgettable images without compromising comfort or safety.
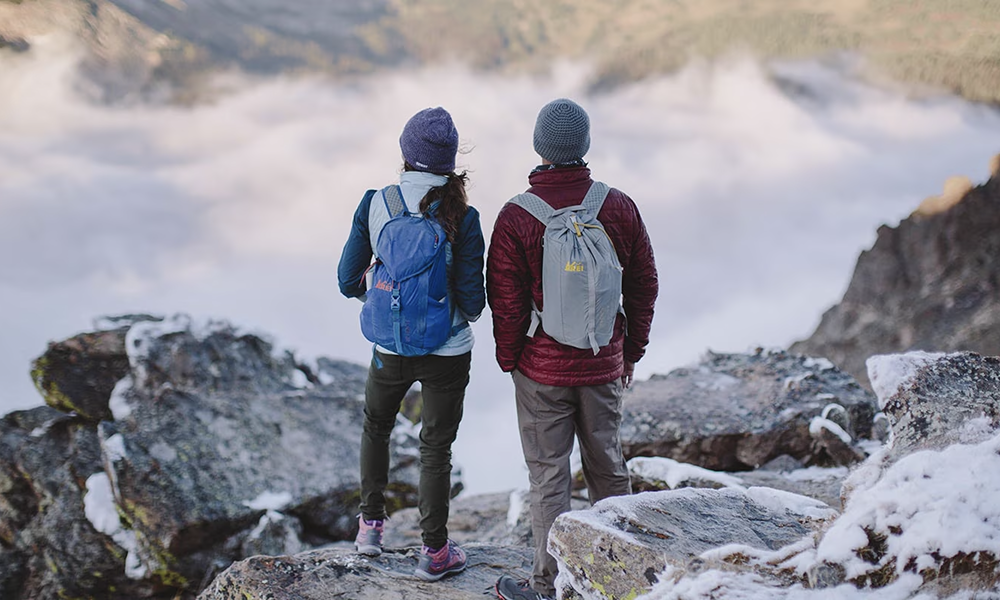
🏔️ 1️⃣ Best Panoramic Spots on the Route
🌅 Salkantay Pass (Abra Salkantay)
Over 4,600 m (15,000+ ft).
- Direct views of the Salkantay glacier
- Dramatic, fast-moving clouds
- Monumental scale
- Strong sky–snow contrast
📸 What to capture:
- Silhouettes of hikers for scale
- Trail leading lines
- Wide-angle landscapes
- Time-lapse of shifting clouds
🎯 Technical tip:
- Slightly underexpose snow scenes
- Use negative exposure compensation if the sky is bright
💎 Humantay Lake (Optional Side Hike)
Turquoise water.
Mountain reflections.
Strong symmetry potential.
📸 Best time:
Early morning to avoid harsh overhead light.
🎯 Pro tip:
- Use a polarizer to reduce glare
- Include rocks in foreground for depth
🌿 Descent into Cloud Forest
Radical landscape shift:
- Dense vegetation
- Mist and fog layers
- Waterfalls and streams
- Deep saturated greens
📸 Ideal for:
- Detail shots (leaves, textures)
- Environmental portraits
- Depth layering with fog
🎯 Tip:
Cloudy light works beautifully here — soft and even.
🏛️ Llactapata Viewpoint
One of the most underrated photo spots.
- Side-angle view of Machu Picchu
- Less crowded
- Unique perspective
📸 Ideal for:
- Ruins in foreground
- Telephoto compression
- Ruins vs mountain contrast
🌌 Night Photography
In remote camps:
- Clear skies
- Strong star visibility
- Milky Way possible
📸 Requires:
- Lightweight tripod
- Wide aperture
- Controlled high ISO
- Short exposures to avoid star trails
⚠️ Cold temperatures drain batteries quickly.
🎒 2️⃣ Recommended Gear by Traveler Type
📱 Phone Photographer (Light & Minimal)
Pros:
- Ultra-light
- Easy sharing
- Always accessible
Suggested settings:
- HDR on
- Manual exposure adjustment
- Avoid heavy automatic filters
Useful accessory:
- Small flexible tripod
- Power bank
📷 Mirrorless / DSLR (Enthusiast Level)
Ideal if:
- You want print-quality images
- You plan astro shots
- You enjoy manual control
Recommended lenses:
- Wide-angle for landscapes
- 24–70mm versatile zoom
- Avoid carrying multiple heavy lenses
Accessories:
- Extra batteries
- Polarizing filter
- Rain protection cover
🎥 Action Camera
Great for:
- POV hiking shots
- Dynamic weather
- Quick transitions
Limitation:
- Lower dynamic range in wide landscapes
🔋 3️⃣ Battery Management at Altitude
Cold reduces battery life significantly (sometimes 30–40%).
Tips:
- Bring extra batteries
- Keep them close to your body
- Don’t leave gear exposed to cold wind
- Use airplane mode on phone
🌄 4️⃣ Best Light Conditions
🌅 Sunrise
- Golden tones
- Softer skies
- Fewer people
- Beautiful mountain texture
🌇 Late Afternoon
- Long shadows
- Dramatic skies
- Strong natural contrast
🌥️ Cloudy Days
- Saturated colors
- Perfect for forest shots
- Soft portrait lighting
Avoid harsh midday light when possible.
🧭 5️⃣ Mountain Composition Techniques
- Use trails as leading lines
- Include people for scale
- Add foreground elements
- Create layered depth (foreground–midground–background)
- Use natural diagonals
- Watch how clouds shape the scene
Mountains naturally provide depth — you just have to position yourself.
⚖️ 6️⃣ Balance Weight vs Creativity
At altitude:
- Every gram matters
- More weight = more fatigue
- Fatigue reduces creativity
Recommendation:
Bring versatile gear.
Leave behind what you won’t realistically use.
The best camera is the one you can carry comfortably all day.
⚠️ Common Photography Mistakes
❌ Bringing too much equipment
❌ Ignoring sudden rain protection
❌ Forgetting to clean lenses
❌ Not planning for battery drain
❌ Failing to adapt to rapidly changing light
The Salkantay Trek combines alpine glaciers, turquoise lakes, misty cloud forests, and rare viewpoints toward Machu Picchu — all in a single route.
With smart packing, good light awareness, and energy management, you can capture extraordinary images without sacrificing comfort or safety.
Travel light. Read the light. Respect the mountain. And let the Andes do the rest 📸


")
