Altitude, Difficulty, and Conditions
The Salkantay Pass is the highest point of the Salkantay Trek and, for most, the most demanding section. Here, altitude, cold, wind, and a sustained ascent combine to feel intense, especially if you’re not well acclimatized. The good news: with preparation and a good pace, you can cross it without much trouble, and the visual reward is breathtaking 😮💨✨
📍 Salkantay Pass Altitude (Why does it feel so tough?)
- Approximate altitude: 4,600 – 4,650 meters above sea level
- It’s normal to experience:
- faster breathing
- a higher heart rate while walking
- heavy legs
- a feeling of fatigue even when walking slowly
What happens in your body: at this altitude, there is less oxygen available, so your body has to work harder to do the same things as at a lower altitude. That’s why the secret isn’t “being fast,” but being consistent 🧠✅
🥾 Real Difficulty (and what it depends on)
The Abra is usually classified as moderate to difficult, but the difficulty varies greatly depending on:
1) Acclimatization
- If you come from sea level and climb directly: you’ll find it very tough.
- If you spend a few days at altitude before the trek: your body responds better.
2) Weather
- With sun: the ascent feels more manageable.
- With wind, hail, or fog: the effort increases and the temperature drops.
3) Terrain
- Dirt/stone path, sections with loose gravel.
- On cold days there may be frost (slippery ground early on).
4) Backpack Weight
- Carrying too much = suffering more. A light backpack makes a huge difference 🎒
5) Pace
- Climbing “in a hurry” is the number one mistake. At that altitude, rushing can trigger headaches or nausea.
⏱️ How long does it take to reach the pass?
It depends on the starting camp (there are several areas where you can sleep before the pass), but in general:
- The climb to the pass: usually takes several hours at a steady pace. The
- most difficult part is usually:
- the last section before the pass (due to altitude and steepness)
- the moment when the cold is at its strongest (if you start very early)
💡 Practical tip: think of the pass as a “long climb” rather than a “sprint.” If you control your breathing, you’ll be fine.
🌡️ Typical weather conditions (what to expect)
The weather at the pass is notorious for changing quickly. You can have sunshine and, in minutes, freezing winds or fog.
Cold and windy
- There is usually strong wind at the pass, which lowers the wind chill.
- Even if it doesn’t snow, the wind can feel freezing 🥶💨
Snow / Hail / Frost
- Sometimes there is snow or hail (more frequent in wet weather).
- Very early in the morning, frost may appear on the trail (watch out for slips).
Solar Radiation
- If the sun is out, the radiation at higher altitudes is intense.
- It’s possible to feel cold and get sunburned even without sunscreen 😅☀️
📅 Seasons and how conditions change
Without getting into exact dates, think of it this way:
Drier season
- Higher probability of clear skies 🌤️
- Breathy cold at dawn
- Firmer paths
- Better visibility of the snow-capped peak
Wetter season
- More clouds, fog, or rain 🌧️
- Greater chance of mud and slips
- Waterproof clothing becomes essential
- There may be occasional hail or snow on the pass
✅ Conclusion: In any season, the pass can be cold and windy. The difference is whether it will also be wet and slippery.
🧠 Altitude sickness: signs to watch for (without panicking)
At that altitude, it’s normal to feel more tired and have rapid breathing. But there are signs that tell you to “slow down”:
Mild/common
- mild headache
- loss of appetite
- mild nausea
- slight dizziness
- unusual sleepiness
What to do if they appear
- slow down immediately
- breathe deeply and steadily
- stay hydrated
- dress warmly (cold worsens discomfort)
- notify your guide or group
⚠️ If the symptoms are severe or worsen (severe pain, persistent vomiting, confusion, difficulty breathing at rest), that is serious: you must call for help and descend.
🧥 Recommended Gear for the Abra (What Really Matters)
- You don’t need “expedition gear,” but you do need the right layers:
- Essential Layers
- Thermal base layer (top and bottom if you get cold easily)
- Fleece or lightweight jacket (mid-layer)
- Windproof/waterproof jacket (outer layer: KEY because of the wind)
- Hat and gloves 🧤
- Neck gaiter or buff (extremely useful in windy conditions)
Extras that really help
- Trekking poles: reduce impact and provide stability (especially if there’s gravel or frost)
- Sunscreen + sunglasses
- Quick snacks (chocolate, nuts, energy bars) 🍫
Footwear
- Trekking shoes with good traction or lightweight boots.
- Comfortable socks (prevent blisters).
🥾 Techniques for crossing it without suffering too much (golden tips)
1) A “conversational” pace
- If you can’t say a short sentence without getting winded, you’re going too fast.
2) Short, steady steps
- At altitude, short steps win.
3) Brief breaks
- Short breaks every so often work better than stopping a lot and getting cold.
4) Don’t get sweaty
- If you sweat, unzip/ventilate, but don’t get wet when the wind blows (you’ll get cold quickly).
5) Eat even if it’s just a little
- At altitude, you sometimes don’t feel hungry, but your body needs energy.
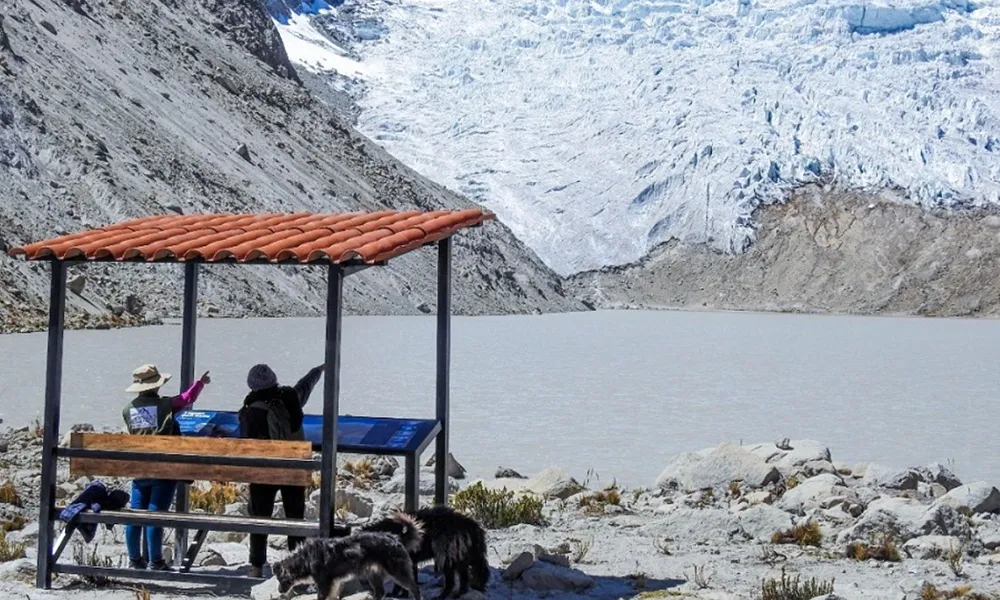
📸 What you’ll see up there (and why it’s so…)
At the Salkantay Pass you’ll typically find:
- powerful views of the Salkantay snow-capped mountain
- high Andean landscape: rock, ichu grass, vast skies
- the feeling of reaching the “roof” of the trek (a truly epic moment) 🤯🏔️
Many travelers feel that this section is the “heart” of the Salkantay: tough, yes, but unforgettable.
⬇️ What comes after the pass?
Generally, after the pass:
- a long descent begins
- the temperature gradually rises
- the landscape changes: from high mountain terrain to greener areas (depending on the route)
💡 Heads up: the descent is also tiring (knees and ankles). Trekking poles are a huge help.
📊 Summary
| Topic | Most Important Point |
|---|---|
| Altitude | 4,600–4,650 meters above sea level |
| Difficulty | Moderate to challenging (due to altitude + weather) |
| Common risks | Cold, wind, fatigue, mild altitude sickness |
| What helps the most | Acclimatization, steady pace, layering, and trekking poles |
| #1 Tip | Don’t rush: “slow and steady” wins |
Salkantay Pass: The True Challenge of the Trek
Salkantay Pass is not just the highest point of the trek; it’s the moment you truly feel the magnitude of the Andes. The combination of extreme altitude, cold winds, and a sustained ascent makes it the most demanding section of the route, but also the most memorable.
Crossing this pass means overcoming the greatest physical challenge of the Salkantay Trek. It’s not about speed or brute strength, but about strategy: proper acclimatization, a steady pace, hydration, and adequate clothing make all the difference.
Although the effort is intense, the reward is incomparable: breathtaking views of Nevado Salkantay, awe-inspiring high Andean landscapes, and the personal satisfaction of having reached one of the highest points on any alternative route to Machu Picchu.
In short, Salkantay Pass is the heart of the trek: challenging, cold, and demanding… but absolutely epic. Conquering it is not just crossing a mountain pass; it’s conquering one of the most powerful moments of the journey.


